Getting Ready For A Moving Project

Relocating to a different area can be a very nerve-wracking process for one to go through. The thought of moving through all the stuff you possess (including stuff you do not even recall why you still have them), boxing them up, relocating them to another area, removing them from the boxes and getting the best area for them in your new place can be stressful. Whether one is coming from a flat in the middle of town and going to a house on the outskirts, some tactics can be played to make the experience better and hustle free.

Identify Where You Want To Move To

It would be best first to identify a house to move to before selling the house you are presently occupying. Do not delay until the time on your tenancy agreement is over and have no choice but to leave your current home.  This piece of advice will prevent you from having too much pressure and anxiety (or being forced to seek shelter at a pal’s abode). It will also allow you to settle for the best place of your choice instead of just any house. When you have ample time to search for your dream home, you will have an opportunity to learn about the communal occasions and ensure the area you will eventually live in has all the qualities and facilities you require on a daily basis. Waiting until you have moved from your flat or have put it up for sale could make you compromise on the features you would like in your new home or force you to rent out storage space.

Have A Book To Take Notes On

Instead of taking digital notes on devices which only you have access to, use a notepad to help you stay orderly during the relocation. Write down necessary contacts of pals and your kin, Ajax movers and other experts in the field that you may need to reach out to. Come up with an inventory of everything you need to see to, such as switching your posting address, taking out your solar powered lights, and ensuring that you have not forgotten any garments in the dryer. Come up with a record of all the items you need to purchase, persons to reach out to and stuff to execute.  (Make sure to keep the notepad as securely as you keep your handset).

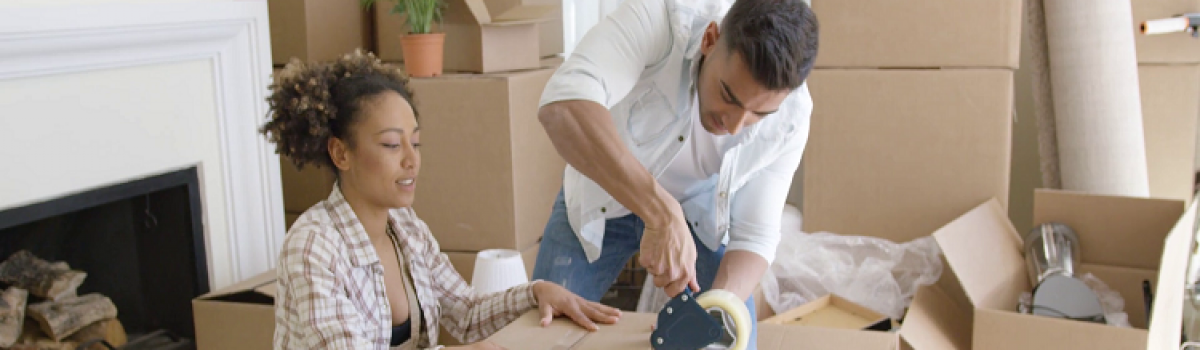
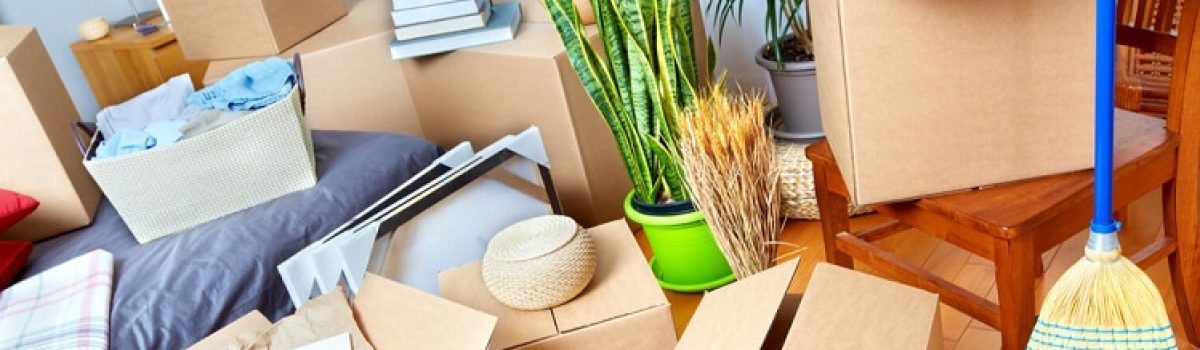
Procure Materials Needed For Relocating

From durable marker pens, packing adhesive, huge bags, to bubble wrap, cartons, and plastic containers, buy everything you will need ahead of time. Even though you may run out of these materials as you pack, it is important to have a good amount of all the supplies from the start, to ensure that packing is stress-free.  Additionally, visibly indicating on each carton or container what is inside and which part of the house they will be put in will help make unpacking easy. It will ease your mind to know where every item is in case you need to use them before you finish unpacking everything.

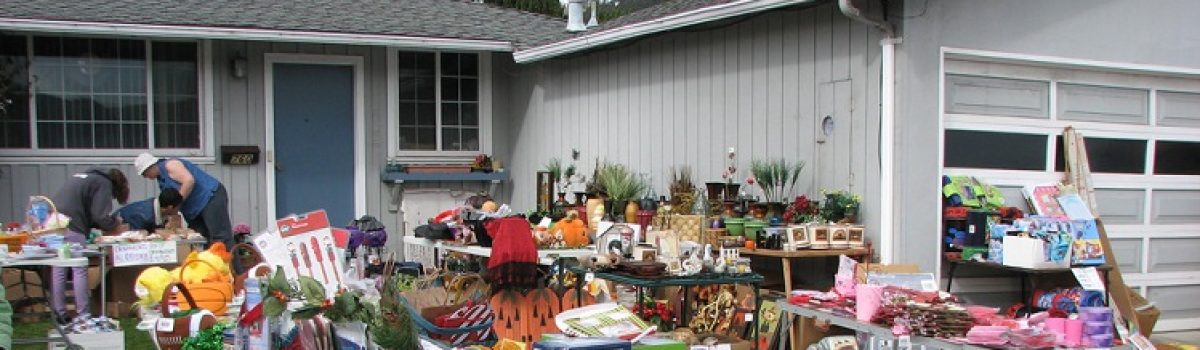
Identify Things To Keep Or To Give Away

This is the most appropriate time to organize your things fully. When you plan, you have a lot of time to sort out your things in every part of the house. Sort out all the items that had been lumped together and considered as rubbish, as opposed to just throwing them into a container and relocating with them. Identify the things you could throw away, give to charity and those you wish to save.  Be minimalistic and simplistic. Moving process gives you a chance to de-clutter.  You may find you have multiple items that are still in their packaging, think about doing a garage auction. If you are moving to a smaller space without much room for storage, pack only the things that are most valuable and essential, then vend the rest or give them away to charity. You need not hire storage facilities for the stuff that will not fit in the house you move to.

Mind What You Toss Out

You need to be careful when deciding what to vend, give away or throw away. When you do not sort through all your things in good time, you could find that you threw out even stuff that you could need later on and be disappointed that you did. Do not rush to throw away lanterns, seats, artwork, festival beautifications, kitchen items, equipment or lots of other things that you need to retain. If there is a vegetable patch in the new place that will require care of or a backyard that will require maintenance, pack your gardening equipment.

Whereas these guidelines will aid in decreasing the hustle of relocating, probably the best advice is to be adaptable. Things could go wrong even when planned well. Even though you may have a say on whether you will stash all your valuable things into a number of trash carriers and throw them into the back of the car the evening prior to the move, or you will make preparations way ahead of time, to ensure you have a relaxed, orderly and enjoyable move- there will be many details that will be beyond your power. Recognizing and appreciating that point from the beginning will assist you happy and satisfied throughout the moving process and could also motivate your pals and kin to keep assisting you when moving. If you require the services of experts in the field, consider using Ajax Movers.

We recommend you to read “Tips On Organizing A Successful Yard Sale” and “Five Steps To Transfering Medical Records During A Haul”.

Five Steps To Transferring Medical Records When Moving

When planning for a cross-country relocation, most people do not put much thought into how their medical records will be transported from their current spots to the health staffs in the other place. For local moves, this need not be an issue since you will most likely not be switching doctors.

Knowing the best steps to follow to get this done may be a little confusing and stressful for some. The Personal Information Protection and Electronic Documents Act (PIPEDA) gives people the right to carry their health accounts with them when they get new healthcare services or relocate to a different city. Oshawa movers have come up with five easy steps to guide you through it.

  1. The first thing to do is to figure out who and where these files are being transferred to. As soon as you establish your new health care providers, get all their contacts. To avoid ending up getting a quack or an ill-trained doctor, carry out thorough research from online sites, as well as get references from kinfolk and friends who could be residing there. Inquire further once you narrow them down to approve that they are indeed experts. This will let you know that the accounts with experts and that they are protected.
  2. See if you are required to transfer everything or only some particulars of the records. Bear in mind that you are the only person with complete regulation over what will be reassigned, so certify that you are aware of the more crucial ones. Consult the new doctors as well and get to know which papers they want, or which info is beneficial so that you can get it all.
  3. Have a chat with your physician and know how the current data is being kept. Some may only have paper records while others prefer to have them stored electronically. They should not ask for any payment to transfer the data but could charge you for copying and mailing the papers. Note that it could be a while for them to put everything together and deliver it to you, so once you have the date of the move set, inform them in advance so that they can prepare.
  4. After you have put in the request, check now and then if the records are ready. PIPEDA provides for a thirty day period for the provider to get the patient’s records to them after the first request. That is why it is also necessary to put in the request early to give them enough time to gather the records. If not, you may be forced to pay for the archives to be shipped across the country if they are not ready by when you are relocating.
  5. If there are any paper documents, check that they are in waterproof containers or envelopes so that they do not get damaged during shipping. For automated data, ensure that they are secure and backed up just in case the computer fails. One can store them online in places like DropBox or Google Drive. We recommend having these papers with you rather than putting them in the truck with the rest of the items.

We recommend you to read “A Two Month Preparation Plan For A Cross-Country Move” and “Ways To Plan A Summer Relocation”.

A Two Month Preparation Plan For A Cross-Country Move

When planning to relocate, especially over a long distance, the amount of preparation you put into all the stages will determine how successful the venture will be. That’s not to say that local movers do not need to be properly thought over, but there are more things to worry about when it comes to a long distance move. If, for example, you forget something, turning back for it will not be a big deal, but for a cross-country move, it may affect the travel time. To ease the process and be ready for when the D-day arrives, Calgary Movers have a guide on how to go about this.

Two months before the day

Begin the process two months prior to the set date to get enough time to set the whole lot in order. One can get a file to keep all the necessary moving papers, or go digital by getting a note taking app installed on their phone, to keep track of everything. Some apps allow you to add in pictures of receipts or other key papers so that you can have copies in case they get lost.

Some items to have in this folder are receipts, movers’ contract and chief dates, travel papers, utility info, a list of the stuff being carried and stuff being thrown away or donated and any additional crucial paperwork. Measure the fixtures once more and confirm that they will fit in the new abode. After all that, you can now pack things that won’t be used in the days before the move. Additionally, know if you’ll carry out the task by alone, or if a moving crew will be hired.

A month to relocation

Start calling the current home service providers and inform them of the moving project and that there might be some cancellations and changes. If you are thinking of renting or selling it, talk to the new landlord or owners and coordinate how to keep the utilities running if they so wish. However, do not cancel them now since water and electricity are still being consumed.

Talk to your current doctors as well and get all the needed forms from them so that you can assign them to the new area. Do the same for schools, banks and also fill forms to change your address.

Three weeks before the haul

If there any machines that you need to be fixed, this is the best time to do so. Also, book any reservations like rest stops at motels. Another thing to do is contact your utility providers and work on transferring them or canceling all together.

Two weeks to D-day

At this point, go through the possessions and check if there are any objects that you may have borrowed from neighbors, kin or pals and get them back to their owners. Also, get back anything that you may have loaned them in return.

One week

The long-awaited day is almost here so now you should be getting ready for the road trip. Separate the things that will be in the car with you from those that will be in the truck, and make sure all is packed. Finish any payments that need to be done, and then clean and repair anything that needs to be done so.

Moving day

On the day of the move, go over every room several times to check if any knickknacks have been forgotten. See to it that all cabinets, closets, attics and crawl spaces have been thoroughly checked as well. Once you are ready to leave, close all the windows and doors, and turn off the gas, water, the HVAC system and also turn out the lights.

We recommend you to read “Tips On Organizing A Successful Yard Sale” and “Sprucing Up A Rental Space”.

Tips On Organizing A Successful Yard Sale

When planning a move, packing up belongings can be a very stressful task, but it cannot be avoided. Nonetheless, there are some ways one can make this easier to do. The first thing is to check that you do not end up wasting money and other resources boxing up items that are neither useful nor needed. This can be done using several methods, one of them is having a yard sale to sell the unneeded stuff.

Organizing and executing a yard sale may look like too much work, but it can be a smooth process if one properly plans it out in advance. The best thing to do is to begin preparations a couple of weeks or days earlier, this way you won’t have to rush to hold one last minute. Thornhill movers advise the following when it comes to such a venture.

For a yard sale to be successful, the timing has to be perfect, or at a convenient time. People may not want to leave their warm houses during winter. Miracle Movers advise you to plan relocation for the late spring or early fall. When it comes to picking out a day, weekends are better because most people are at home and not caught up with work, and so they will be able to show up. Scheduling it for a Saturday is even more advantageous in the sense that if a lot of stuff is left, you could always have one on Sunday as well.

Go for early morning hours too, especially if the sale is during the summer because it gets hotter as the day goes by and it may not be advisable to stand outside for hours in the heat. Even if the weather is lovely, most individuals prefer early sales so that they can be able to do other things with the rest of the day.

Thornhill movers advise the following when it comes to organizing a yard sale:

Sort through the items

As soon as the day and date have been decided, the next thing to do is to figure out which items will be sold. Apart from getting you some extra cash, this is also a good way to get rid of all the clutter. A way to figure out what to let go of is if the object has not been used in a while and will not be used any time soon.

Nonetheless, some things are usually spoilt or too far gone to be sold and can only be thrown away. Each person may come to the sale looking for something different, so make sure to sort through everything from clothes, to electronics to furniture. For the items left behind, one could always recycle or donate them.

Advertise your sale

After figuring out what to put on display, next is making people aware that there is going to be a yard sale. An easy way to do this is by making signs and putting them around the area. These signs mostly have the dates, timings, and venue. Having a short list of items that will be sold also helps because sometimes people find it helpful to know what to expect, and if the sale is worth coming to. Also, make some posters that will be near the place and make them colorful to catch people’s attention and make it easier for them to find the house.

If you live in a community that has an online group or community board, make an online advertisement too and utilize social media as well. With social media, you’ll even be able to reach to the pals of your pals and bring even more traffic your way.

Get the supplies

The items on sale will need to be properly displayed, so it is important to know what you will need. Get items such as chairs and tables to place things on. For clothes, it is easier if you can get a rack to hang them on because it makes going through them easier. Some other knickknacks to get are stickers, tags, and tape.

Also, get some lose money like smaller bills and coins so you can have changed to give which can easily be gotten from a local bank.

Sort and add prices to the objects

To make work easier, it is best to arrange the things in categories like clothes, books, electronics, etc. and keep them together. After this, then the price tags can be attached to every piece. Most people tend to overprice their items so that they can make more money, but this only puts people off, and eventually, most of the things will end up not being bought. Set realistic prices that will be good to you and also to the ones buying. Also be ready for people to negotiate.

Stay organized throughout

To save on time, try as much as you can to have everything grouped and put in boxes, or hanged before the date of the sale. Make the signs and price tags ahead of time as well so that when the D-day arrives, you will have plenty of time to set things up rather than trying to organize and get materials last minute.

Ensure that sales are made

People tend to bargain while buying items, especially at a yard sale. For this reason, avoid being so caught up on the set prices so much so that you end up not selling anything. Since you are decluttering, it is better to get a lower price than to be left with the items.

Know where the items that are left behind will go

Some pieces might not sell but that’s okay, they can be taken to a local charity and donated. For anything else that was too old or damaged, consider throwing them away rather than keeping them.

We recommend you to read “Sprucing Up A Rental Space” and “Ways To Plan A Summer Relocation”.